How to Make Your Own Vinyl Record at Home: A Beginner’s Guide to DIY Vinyl Pressing
November 13, 2024

Vinyl records have made a remarkable comeback in recent years, captivating music lovers and collectors alike. The warmth of analog sound, the larger-than-life album art, and the tactile experience of physically handling a record make vinyl an alluring medium. For those passionate about music, there’s no better way to connect with your favorite sound than by creating your own vinyl record at home. In this guide, we’ll explore the world of DIY vinyl pressing, covering everything from the necessary equipment to the intricate steps involved in making your own vinyl record.
1. Understanding Vinyl Records
Before we delve into the vinyl pressing process, it’s essential to understand the anatomy of a vinyl record. At its core, a vinyl record is a physical medium that contains music encoded in grooves. Here are some key components to familiarize yourself with:
- The Groove: The spiral track that holds the audio information. The width and depth of the groove determine sound quality.
- The Label: A printed area at the center of the record that typically displays the artist’s name, album title, and track listing.
- The Core Material: Vinyl records are usually made from a PVC mixture that provides durability and a better sound experience than cheaper alternatives.
Creating your vinyl record will require understanding these components and how they work together to produce sound.
2. Essential Equipment for DIY Vinyl Pressing
Now that you have a basic understanding of vinyl records, let’s gather the essential equipment you’ll need for DIY vinyl pressing:
- Audio Source: You’ll need audio files of the music you wish to press onto vinyl. High-resolution files like WAV or FLAC are recommended for optimal quality.
- Cutting Lathe: This specialized machine cuts grooves into a disk (usually made of lacquer) to create a master record. They can be expensive, so look for models like the Vinyl Recorder or the Alpha Recording System if you’re on a budget.
- Lacquer Disks: These are the substrates you’ll use to cut your grooves. The quality of your lacquer will significantly influence the final sound quality of the record.
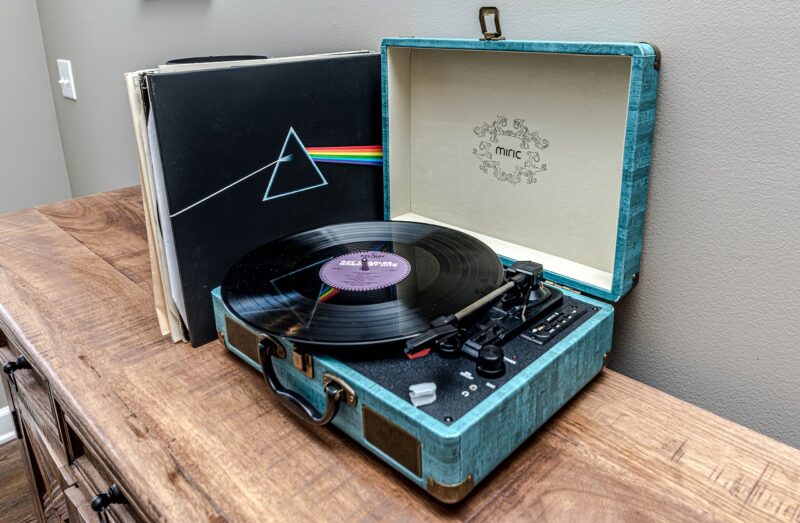
- Turntable: A quality turntable is essential for playing back your finished vinyl record and ensuring the sound fidelity is spot on.
- Amplifier and Speakers: Invest in good speakers to fully enjoy the sound of your DIY record. An amplifier will also provide the necessary power for quality playback.
- Record Cover Materials: If you want to go all out, gather materials for album covers, including cardstock for the jacket and printing equipment for your artwork.
If you’re serious about DIY vinyl pressing, consider budgeting for a cutting lathe and lacquer disks as they will be the costliest yet crucial equipment for the entire process.
3. Preparing Your Audio Files
Before transferring your music to vinyl, the audio needs to be prepared:
- Edit and Master Your Tracks: Use audio editing software (like Audacity or Adobe Audition) to edit tracks, adjust levels, and apply any effects. Make sure your final mix is of the highest quality.
- Cut Your Tracks to Length: A standard vinyl record can have a duration of about 20-25 minutes per side. Make sure to cut your tracks to fit within this limit to optimize sound quality.
These steps will help ensure that your audio will sound great once pressed onto vinyl and prevent distortion during playback.
4. The Vinyl Pressing Process
Once your equipment is ready and your audio files are prepared, follow these steps to press your vinyl record:
- Setup Your Cutting Lathe: Make sure the cutting lathe is in a stable area, following the manufacturer’s safety instructions. Ensure all equipment is properly calibrated before starting.
- Load the Lacquer Disk: Place the lacquer disk onto the cutting spindle of the lathe. Ensure it is securely attached and level for accurate cutting.
- Transfer Audio to the Lathe: Connect your audio source to the lathe and load your prepared audio files. Squash the audio down into the grooves in real-time as the lathe cuts the lacquer disk.
- Monitor the Cutting Process: Watch as the machine cuts the grooves, adjusting levels to avoid distortion. This process may take some time depending on the length of your tracks.
- Finish Cutting and Remove the Lacquer: Once done, carefully remove the lacquer disk from the lathe. Inspect it for any imperfections and clean it if necessary.
This is where the magic happens, as your audio file transforms into a physical medium ready for playback.
5. Creating the Pressing and Quality Control
After you’ve successfully cut the lacquer, it’s time for the pressing to occur:
- Make a Mother and Stampers: The lacquer creates a master recording, from which you can create a metal mother and then stampers. These can be used for mass production or individually pressed records, depending on your preference and budget.
- Test Pressing: Before committing to larger runs, perform a quality check on a single test pressing. This will allow you to sample the audio and identify any issues with the grooves or track length.
- Final Adjustments: If necessary, adjust the audio or re-cut the lacquer if there are issues in the test pressing. Repeat this process until you’re satisfied with the sound quality.
Quality control is paramount to ensure your creations sound as intended.
6. Designing Your Album Cover
An album is not only about the music; the visual art plays a critical role. Here’s how to bring your album cover to life:
- Choose Your Artwork: Decide whether to use original artwork, photography, or graphic design. This can be a reflection of the album’s content or your artistic vision.
- Design the Cover: Use graphic design software (like Canva or Adobe Photoshop) to layout your album artwork. Ensure it meets industry dimensions to fit the vinyl format (standard size is typically 12 inches square for LPs).
- Printing Options: Choose high-quality cardstock for printing your album cover. There are numerous print-on-demand services that can assist with high-quality prints for your albums.
A well-designed album cover enhances the overall experience and adds a professional touch.
7. Enjoying Your DIY Vinyl Record
Once you’ve gone through the process, it’s time to enjoy the fruits of your labor. Here are a couple of tips on caring for your vinyl record:
- Proper Storage: Store your vinyl records vertically in a cool, dry place, away from direct sunlight and extreme temperatures. This helps prevent warping and keeps the grooves in good condition.
- Cleaning Your Records: Use a carbon fiber brush to clean your records before each play to remove dust and lint. Occasionally, use a cleaning solution for deeper cleaning.
Enjoy your own music on a format that reflects your unique sound and artistry!
Conclusion
Creating your own vinyl records at home is not only a rewarding DIY project but also a creative way to showcase your music. It allows you to connect more deeply with the craft of audio production and appreciate the beauty of the analog format. By following the steps in this guide, you can produce high-quality vinyl records that reflect your personal taste and artistic vision. Whether you’re an aspiring artist or a music enthusiast looking to embark on a creative endeavor, DIY vinyl pressing can be a fulfilling avenue to explore. Start your vinyl journey today,
and let the music play on!
To truly capture your passion for music and the vinyl-making process, consider documenting your journey. This can offer a unique perspective on what it takes to create your own records and inspire others to follow in your footsteps.
Happy pressing!


