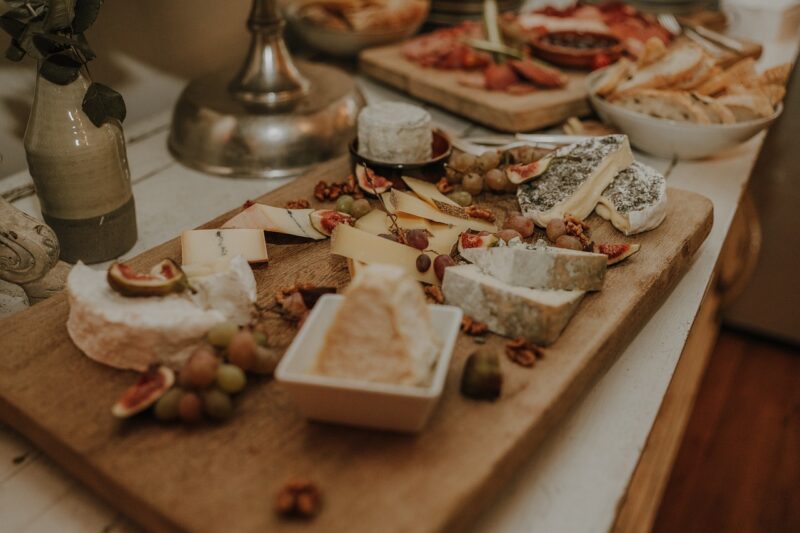
Charcuterie boards are not just a meal; they are a beautiful experience that brings people together. A well-designed charcuterie board can be a centerpiece for any gathering, be it a casual brunch, a dinner party, or a holiday celebration. The best part? It’s incredibly easy to create a stunning and delicious charcuterie board in just five simple steps. Let’s dive into the art of charcuterie!
Step 1: Choose Your Board
The foundation of your charcuterie board is the board itself. While traditional boards are made of wood, you can be creative and use a variety of materials. Here are some popular options:
- Wooden Board: Classic and sturdy, a wooden board is a great choice for serving a variety of meats and cheeses.
- Slate Board: This offers a sleek, modern look and can be labeled with chalk for easy identification of different items.
- Marble Board: Ideal for keeping cheese cool and adds a touch of elegance to your presentation.
- Serving Platter: For smaller gatherings, a simple serving platter can suffice, giving you flexibility in terms of design.
Choosing the right board is crucial because it determines how you will arrange your food and contributes to the overall aesthetic.
Step 2: Select Your Meats
The heart of a charcuterie board often lies in its meats. You want a variety of flavors and textures to keep things interesting. Here are some excellent options:
- Prosciutto: This thinly sliced, dry-cured ham adds a salty flavor and works well with fruits and cheeses.
- Salami: Opt for various types, such as Genoa or pepperoni, to provide depth to your board.
- Chorizo: This spicy Spanish sausage adds a kick and a lovely red color to your display.
- Capicola: Another fantastic cured meat that incorporates a spicy-sweet balance.
Arrange the meats on your board in a visually appealing manner—fold them, roll them, or create small stacks to maximize the presentation.
Step 3: Choose Your Cheeses
Just as with meats, a variety of cheeses will entice your guests. Aim for different textures and flavors:
- Soft Cheese: Brie or goat cheese adds creaminess and is a perfect complement to dried fruits.
- Hard Cheese: Aged cheddar or Parmigiano-Reggiano offers a robust flavor and nice texture contrast.
- Blue Cheese: For those who enjoy a bold taste, add a small wedge of blue cheese for a punch of flavor.
- Flavored Cheese: Consider adding a cheese with herbs or spices to surprise your guests.
Remember to slice some of the hard cheeses for easy serving and to keep the presentation appealing.
Step 4: Add Accompaniments
Accompaniments take your charcuterie board to the next level by adding flavor contrasts and textural variety. Here are some great choices:
- Fresh Fruits: Grapes, apple slices, or figs are delicious options that add sweetness.
- Dried Fruits: Apricots, raisins, or dates provide chewiness and concentrated sweetness.
- Nuts: Almonds, walnuts, or pecans add a crunchy texture and nutty flavor that pairs well with cheese.
- Olives and Pickles: These provide a briny contrast that enhances the overall flavor profile.
- Spreads: Consider adding honey, fig jam, or mustard for extra flavor options that can be enjoyed with meats and cheeses.
These accompaniments should be arranged around the meats and cheeses on your board, providing color and contrast to your arrangement.
Step 5: Final Touches and Presentation
Once you have the main components on your board, it’s time to add the finishing touches. Here are some tips for a stunning presentation:
- Color Balance: Aim for a color balance across the board. Use vibrant fruits and colorful nuts to create a visually appealing layout.
- Height Variation: Use small bowls for olives or dips to create varying heights and add dimension to your board.
- Garnish: Fresh herbs like rosemary or thyme can be scattered on the board for pops of green and aroma.
- Labels: If you’re serving different types of cheese, consider labeling them to inform your guests about their options.
When you’re done, take a step back to admire your work! Your charcuterie board should be inviting and tempting, ready for guests to enjoy.
Conclusion
Creating the perfect charcuterie board is easier than you might think! By following these five simple steps—choosing the right board, selecting fine meats and cheeses, adding delicious accompaniments, and paying attention to presentation—you’ll impress your guests at your next gathering. Remember, the key is variety: a mix of flavors, textures, and colors will leave everyone raving about your culinary skills. Enjoy the journey and have fun experimenting with different combinations as your charcuterie board evolves into a personal art form that reflects your tastes!
Whether it’s an intimate gathering with friends or a festive party, your charcuterie board will undoubtedly be the highlight of the table, sparking conversations and creating memories around the shared love of good food.


