Fermenting food at home is an ancient practice that has gained modern popularity due to its health benefits, long shelf life, and unique flavors. Whether you’re interested in making sauerkraut, kombucha, or pickles, fermentation is an easy and rewarding way to preserve food while promoting good gut health. This beginner’s guide will walk you through the basics of fermentation, how to get started, and some simple recipes to try at home.
1. What is Fermentation?
Fermentation is a natural process where microorganisms like bacteria, yeast, and fungi convert sugars into acids, gases, or alcohol. This process helps preserve food, enhances flavor, and creates beneficial probiotics. Common fermented foods include sauerkraut, kimchi, yogurt, kombucha, and pickles.
Fermentation occurs in anaerobic (oxygen-free) environments and typically requires little more than salt, water, and the right temperature. The result is food that is not only delicious but also packed with probiotics that support digestion and gut health.
2. Essential Tools for Fermenting at Home
Before you start fermenting, you’ll need a few basic tools. Fortunately, fermenting food at home doesn’t require any fancy equipment. Here’s a list of what you’ll need:
- Glass jars or ceramic crocks: Wide-mouthed glass jars or fermenting crocks are ideal for holding your food during fermentation. Avoid using metal containers as they can react with the acids produced during fermentation.
- Weights: To keep the food submerged in the brine, you’ll need weights. You can use glass weights made for fermentation or a simple DIY solution like a clean, heavy stone wrapped in plastic.
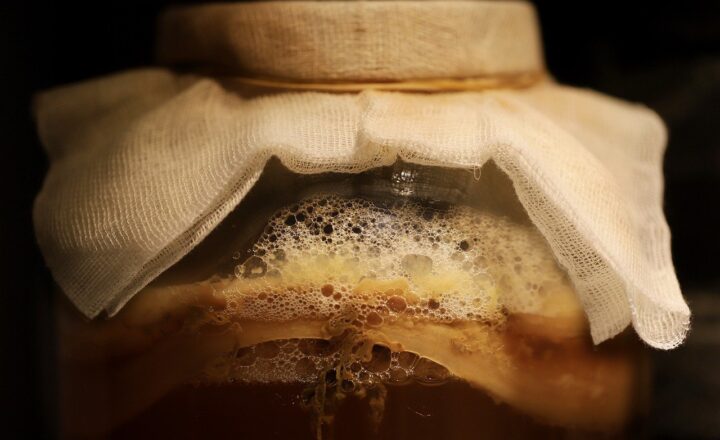
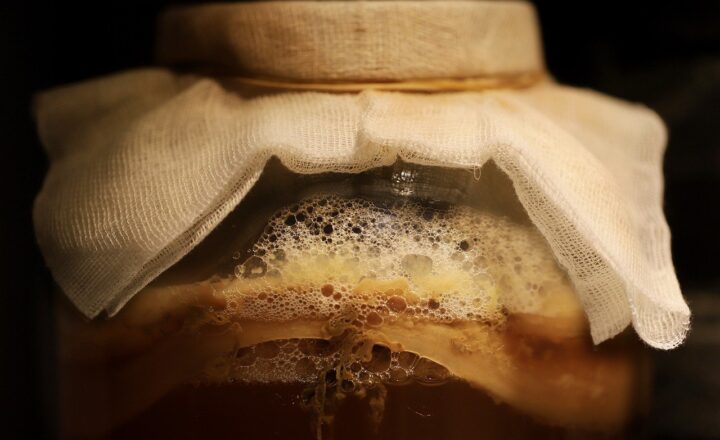
- Fermentation lids or cloths: Specialized fermentation lids with airlocks are helpful, but not essential. You can also cover your jars with a breathable cloth to keep dust and bugs out while allowing gas to escape.
- Salt: Non-iodized salt like sea salt or kosher salt is essential for creating the brine that promotes fermentation. Avoid iodized salt as it can interfere with the fermentation process.
Having the right tools ensures your fermentation process is smooth and successful, especially for beginners.
3. The Basics of Fermenting Vegetables
Fermenting vegetables is one of the easiest and most popular methods to start with. Here’s a step-by-step guide to fermenting your first batch of vegetables:
- Choose your vegetables: Cabbage, carrots, cucumbers, radishes, and beets are great options for beginners. You can ferment one type of vegetable or mix several together.
- Prepare the vegetables: Wash your vegetables thoroughly and cut them into uniform pieces for even fermentation. For cabbage, you can shred it; for cucumbers or carrots, slice them into sticks or rounds.
- Make the brine: Dissolve about 1 tablespoon of salt in 2 cups of water to create the brine. You may need more or less brine depending on the amount of vegetables you’re fermenting.
- Pack the jar: Place the prepared vegetables in your jar, packing them tightly to remove any air pockets. Pour the brine over the vegetables until they are completely submerged.
- Add weights: Place a weight on top of the vegetables to keep them fully submerged in the brine.
- Cover the jar: Use a fermentation lid, or cover the jar with a cloth and secure it with a rubber band. This will allow the gases from fermentation to escape while preventing contamination.
- Let it ferment: Place the jar in a cool, dark place, ideally between 65-75°F (18-24°C). Fermentation time varies, but most vegetables will ferment within 5-10 days. Taste the vegetables after 5 days and continue fermenting until they reach your desired flavor.
Once the fermentation process is complete, transfer your vegetables to the fridge, where they can be stored for several months.
4. Fermenting Drinks: How to Make Kombucha
Kombucha is a fermented tea that has gained popularity for its probiotic content and refreshing taste. Making kombucha at home is easy once you have the necessary ingredients, including a SCOBY (Symbiotic Culture of Bacteria and Yeast).
Here’s how to get started with kombucha:
- Brew the tea: Boil 4 cups of water and add 1-2 tablespoons of black or green tea leaves. Let the tea steep for 10 minutes, then remove the leaves or tea bags. Stir in 1 cup of sugar until it dissolves.
- Cool the tea: Allow the sweetened tea to cool to room temperature before pouring it into a clean glass jar.
- Add the SCOBY: Once the tea is cool, add your SCOBY along with 1 cup of pre-made kombucha (from a previous batch or store-bought, unflavored kombucha) as a starter liquid.
- Ferment: Cover the jar with a breathable cloth and secure it with a rubber band. Place the jar in a warm, dark place, ideally between 68-85°F (20-29°C), and let it ferment for 7-10 days.
- Taste and bottle: After 7 days, taste the kombucha. If it’s too sweet, let it ferment longer. Once it reaches your desired level of tartness, remove the SCOBY, and pour the kombucha into bottles for storage in the fridge.
For a second fermentation to add flavor and fizz, you can add fruit juice or ginger to the bottled kombucha before sealing and letting it sit for 1-3 days at room temperature.
5. Tips for Successful Fermentation
Here are some tips to ensure your fermentation process is successful:
- Use high-quality ingredients: Fresh vegetables, filtered water, and non-iodized salt produce the best results. Avoid tap water if it contains chlorine, as it can interfere with fermentation.
- Maintain proper temperature: Fermentation is temperature-sensitive, and too much heat or cold can slow down or stop the process. Aim for a consistent room temperature between 65-75°F (18-24°C).
- Keep everything clean: While fermentation creates a safe environment for good bacteria, it’s important to start with clean jars, utensils, and hands to avoid introducing harmful bacteria.
- Be patient: Fermentation takes time. Don’t rush the process, and check on your ferment regularly to ensure it’s progressing properly. Taste-test to find the right balance of flavor and sourness.
6. Common Fermentation Mistakes to Avoid
As with any new process, there are a few common mistakes beginners might make. Avoid these pitfalls for successful fermentation:
- Not keeping vegetables submerged: If vegetables are exposed to air, they can develop mold. Always use weights to keep them fully submerged in the brine.
- Using too much or too little salt: Salt is essential for creating the right environment for fermentation. Too much can prevent fermentation, while too little can lead to spoilage.
- Rushing the process: Fermentation takes time, so resist the temptation to open your jars too often. Give your ferments time to develop flavor and probiotics.
Conclusion
Fermenting food at home is a fun and rewarding process that offers numerous health benefits. Whether you’re making sauerkraut, pickles, or kombucha, this ancient preservation method is simple, cost-effective, and allows you to experiment with different flavors. With a little patience and the right tools, you can enjoy the benefits of homemade fermented foods that are packed with probiotics and bursting with flavor.


