Sand Sculptures: The Art of Building Masterpieces Out of the Earth’s Most Common Element
November 14, 2024

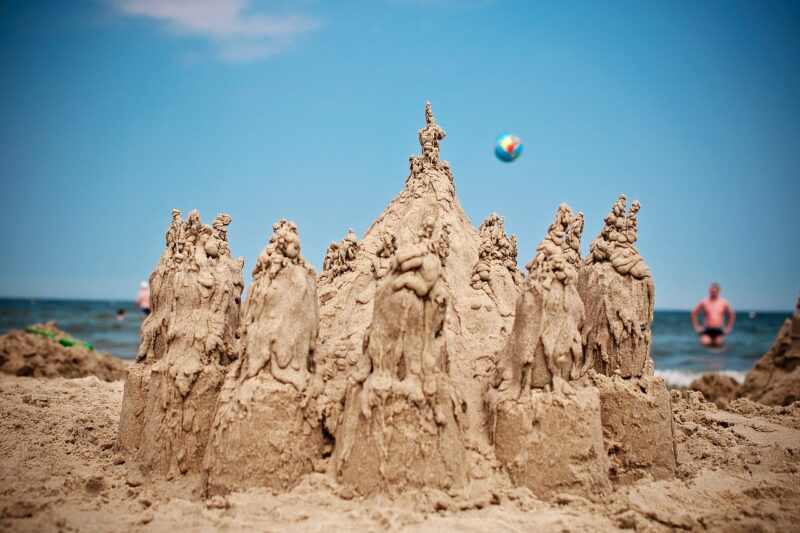
Sand sculptures have mesmerized spectators for centuries, whether they grace our shores during summer holidays or are showcased in competitions around the globe. Artists from all walks of life have transformed the most ubiquitous element on Earth into intricate designs that not only reflect creativity but also an understanding of the medium itself. This article will explore the art of sand sculpting, its techniques, history, and how you can join this fascinating creative pursuit.
1. The History of Sand Sculptures
Sand sculpting’s roots stretch deep into history, tracing back to ancient times when temporary structures were erected for festivals or ceremonial purposes. The first documented sand sculptures appeared as early as the late 1800s in the United States. Over the years, these impromptu artworks evolved into recognized events, blossoming into the popular craft we know today. The annual sand sculpting competitions that take place worldwide highlight the stunning possibilities of what can be created from mere grains of sand.
Today’s competitions attract professional and amateur artists alike, showcasing stunning creations that range from fantastical creatures to architectural landmarks, all made of sand.
2. Understanding Sand: The Key to Mastery
The secret to creating breathtaking sand sculptures lies in the choice of sand. There are many types of sand, and each exhibits different characteristics that affect how well it holds together when wet.
Types of Sand for Sculpting:
- Coarse Sand: This type has larger grains, ideal for building foundations and stability.
- Fine Sand: Finer grains offer detailed resolution and smooth finishes, essential for intricate designs.
- Masonry Sand: Often used in construction, this blend combines various grain sizes, making it versatile for sculpture building.
Once you have the right sand, the next step is adding water to create the perfect consistency. Sand that is too dry will collapse, whereas overly wet sand becomes slippery and unmanageable. The ideal mixture allows the sand to hold its shape when packed together.
3. Techniques Used in Sand Sculpting
Creating sand sculptures requires more than just piling sand. Skilled artists apply various techniques to refine their works:
- Building a Base: Every good sculpture starts with a sturdy base that provides support. Artists often create a large block of compacted sand to work from.
- Carving and Shaping: Using shovels, buckets, and carving tools, artists slowly take away the sand to reveal details. This process is crucial in capturing the intricate elements of the design.
- Wet Packing: This method involves wet sand being tightly packed into molds or forms. The moisture helps the particles bond together firmly.
- Layering: Skilled sculptors build up layers of sand to add depth and detail to their sculptures, allowing for more complexity and variation.
- Finishing Touches: Fine tools are used at the end to add texture and detail, sharpening edges, and enhancing the final appearance of the piece.
These techniques collectively contribute to the artistry involved in sand sculpting, transforming what starts as basic grains into stunning visual masterpieces.
4. Competitions: Showcasing Talent
Competitions are a significant aspect of the sand sculpture community. They range from local events to international tournaments, each offering artists the chance to display their skills while competing for prize money and recognition. Here are a few renowned events:
- The World Championship Sand Sculpting Competition: Held in the U.S., this annual event attracts top sculptors from around the globe.
- The Sandcastle Contest in Cannon Beach: A family-friendly event in Oregon that encourages whimsical designs.
- The British Sand Sculpting Championships: Held annually, this event showcases talent and creativity at its best in the UK.
Competitions like these not only celebrate creativity but also foster community among the artists and enthusiasts.
5. Getting Started: Your Guide to Sand Sculpting
Anyone can take up the art of sand sculpting. Here’s a simple guide to help you get started:
Tools & Materials Needed:
- Quality sand (fine to coarse based on preference)
- Water source (to wet the sand)
- Shovels and buckets (for packing and transporting sand)
- Carving tools (knives, spatulas, and molds)
- Spray bottles (for misting water to keep sand moist while working)
Steps to Create a Simple Sand Sculpture:
- Choose Your Site: Look for an area with ample dry sand and easy access to water.
- Build a Base: Pile wet sand to create a tall mound for your sculpture’s base.
- Shaping Your Design: Gradually carve away sand, following your planned design.
- Details Matter: Add textures and fine details using sculpting tools.
- Protect Your Work: Mist your sculpture with water occasionally to keep it from drying out.
The beauty of sand sculpting lies in its accessibility. With minimal investment and materials, anyone can explore their creativity and enjoy this fascinating art form.
Conclusion
With a blend of creativity, patience, and technique, sand sculpting allows artists of all ages to connect with nature while enjoying a unique and beautiful creative outlet. Whether admired on a beach or exhibited in prestigious competitions, sand sculptures remind us of the art’s transient beauty—fleeting in nature but lasting in memory. So grab some sand and water—and let your imagination run free!
In conclusion, sand sculpting not only celebrates artistic expression but also brings people together, fostering appreciation for creativity in all its forms. Why not give it a try during your next beach visit? You might just uncover a new passion and create your masterpiece out of the Earth’s most common element.


