Getting Started with Arduino: The Beginner’s Guide to Building Your First DIY Project
November 13, 2024

Arduino is a powerful, open-source electronics platform that has gained immense popularity among enthusiasts, hobbyists, and even professionals for creating interactive hardware projects. This guide will take you through the essential steps to get started with Arduino, equipping you with the knowledge and skills to build your first DIY project.
1. What is Arduino?
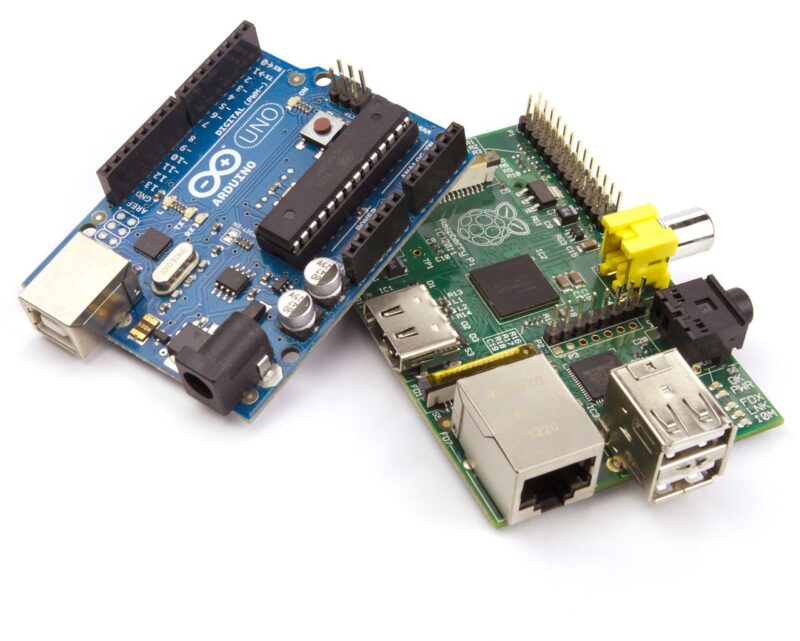
Arduino is a microcontroller-based platform that allows you to create and control electronic devices by writing simple code. It consists of a hardware board with a microcontroller and a software development environment to write and upload code to the board. With Arduino, you can build projects from simple LED circuits to complex robotics systems, making it an invaluable tool for learning electronics and programming.
2. Why Choose Arduino for Your First DIY Project?
Before diving into your project, it’s important to understand why Arduino is a popular choice for beginners:
- User-Friendly: The Arduino IDE (Integrated Development Environment) features simple coding language that’s easy to learn, making it accessible for beginners.
- Versatile: With various models and shields, Arduino can adapt to many project types, from robotics to environmental monitoring.
- Strong Community Support: Arduino has a large community of users who share projects, tools, and tutorials, providing a wealth of resources to help you along the way.
With these advantages, it’s no wonder that Arduino is a top choice for DIY electronics enthusiasts.
3. Setting Up Your Arduino Environment
To get started with building your first DIY project, you’ll need to set up your Arduino environment:
- Step 1: Get Your Arduino Board
There are various Arduino boards available, with the Arduino Uno being the most popular for beginners due to its simplicity and versatility. You can purchase it from electronics stores or online retailers. - Step 2: Download the Arduino IDE
Visit the official Arduino website to download the IDE suitable for your operating system (Windows, macOS, or Linux). Install it on your computer, and when prompted, be sure to install the drivers to allow your computer to communicate with the board. - Step 3: Connect Your Arduino to Your Computer
Use a USB cable to connect your Arduino board to your computer. The IDE should recognize your board, allowing you to start programming.
Once your Arduino is set up, you’re ready to dive into your first project!
4. Your First Arduino Project: Blinking an LED
One of the simplest and most common first projects for Arduino beginners is to make an LED blink. This project introduces you to the basic concepts of circuits, programming, and control structures. Follow these steps:
- Materials Needed:
– Arduino UNO board
– LED (any color)
– 220 Ohm resistor
– Breadboard and jumper wires - Step 1: Build the Circuit
Insert the LED into the breadboard. Connect the longer leg of the LED (anode) to pin 13 of the Arduino and the shorter leg (cathode) to one end of the resistor. The other end of the resistor connects to the ground (GND) pin of the Arduino. This creates a complete circuit that will allow current to flow through the LED. - Step 2: Write the Code
Open the Arduino IDE and write the following code:
“`
void setup() {
pinMode(13, OUTPUT);
}void loop() {
digitalWrite(13, HIGH); // Turn on LED
delay(1000); // Wait for a second
digitalWrite(13, LOW); // Turn off LED
delay(1000); // Wait for a second
}
“`
This code sets pin 13 as an output and continuously turns the LED on and off with a one-second delay between states. - Step 3: Upload the Code
Click the upload button in the Arduino IDE to transfer the code to your board. If everything is set up correctly, the LED should start blinking!
Congratulations! You’ve just built your first Arduino project!
5. Expanding Your Arduino Knowledge
Once you’re comfortable with simple projects, consider exploring more advanced topics:
- Learn about Sensors: Introduce different sensors such as temperature, motion, and light sensors to create interactive projects that respond to the environment.
- Explore Communication Protocols: Delve into serial communication or even wireless options like Bluetooth and Wi-Fi for IoT projects.
- Join the Community: Participate in forums, local maker groups, and workshops to share your projects and gain new ideas and skills.
With a bit of curiosity and creativity, the possibilities with Arduino are endless.
Conclusion
Arduino is an incredible platform that opens up a world of possibilities for electronics enthusiasts and DIYers. By starting with simple projects like blinking an LED, you build a strong foundation in circuitry and programming. As you gain confidence, explore more complex projects and expand your knowledge about sensors, communication, and programming.
Remember, the key to mastering Arduino is practice and persistence. The journey of learning through building projects can be both rewarding and fun. Dive into the world of Arduino and unleash your creativity today!


